|

Gauge Install (December 30, 2008)
This page documents the installation of Autometer gauges into the factory dash cluster. I am using Autometer Phantom electric gauges in my dash. I am using 2 1/16 inch Oil Pressure, Water Temperature, Voltmeter and Fuel Level gauges. I am also using a 3 3/8 inch 0-160 electronic speedometer and a 3 3/8 inch electronic Tachometer.I also needed to fabricate turn signal indicators as well as a brake and high beam indicator. For the turn signal indicators I used the factory locations with modified light sockets. I had to add power leads to the sockets because they originally used the circuit board and the circuit board is no longer being used. The high beam and brake indicators were more difficult since these were originally installed in the speedometer. I decided to put them in the rectangular area between the speedometer and the tachometer that was used for the automatic transmission gear indicator. Since my car will be a manual transmission the indicator will not be needed.
Status photos as of 12/30/2008:
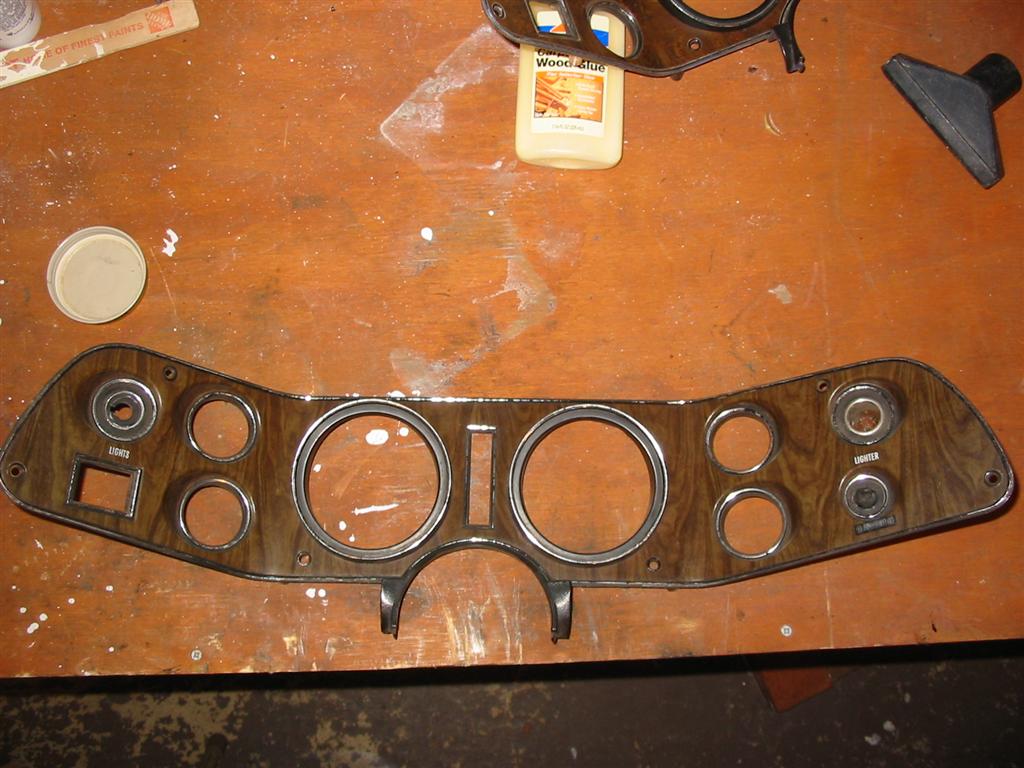
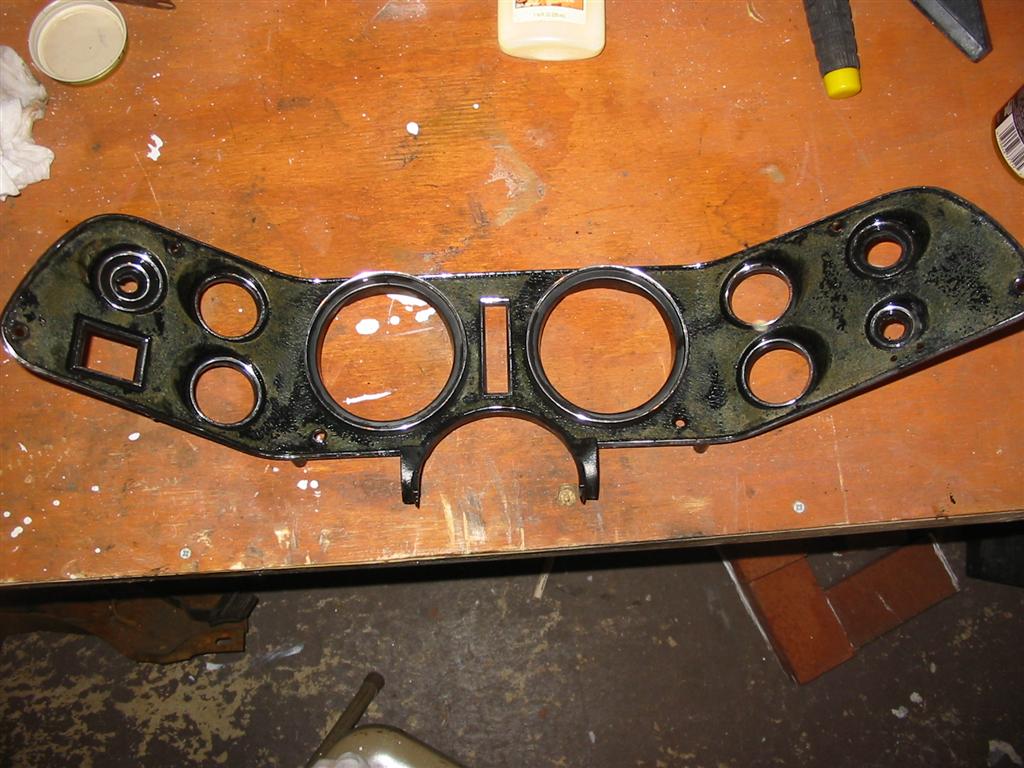
| Here is the original gauge cluster cover. I am not sure what year Camaro this woodgrain panel is out of since I had several parts cars back in the day. | Here is the dash cluster cover with the woodgrain panel removed. I really did not want the woodgrain dash in my car so I removed it. It came off easily and in one piece. |
|
|
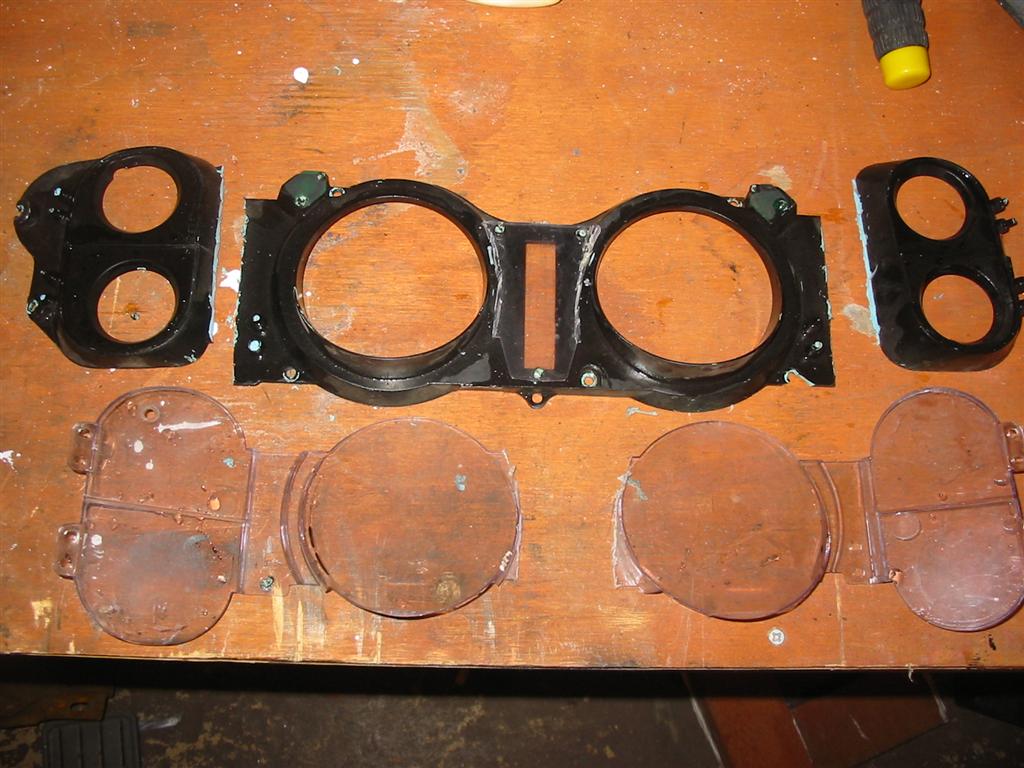
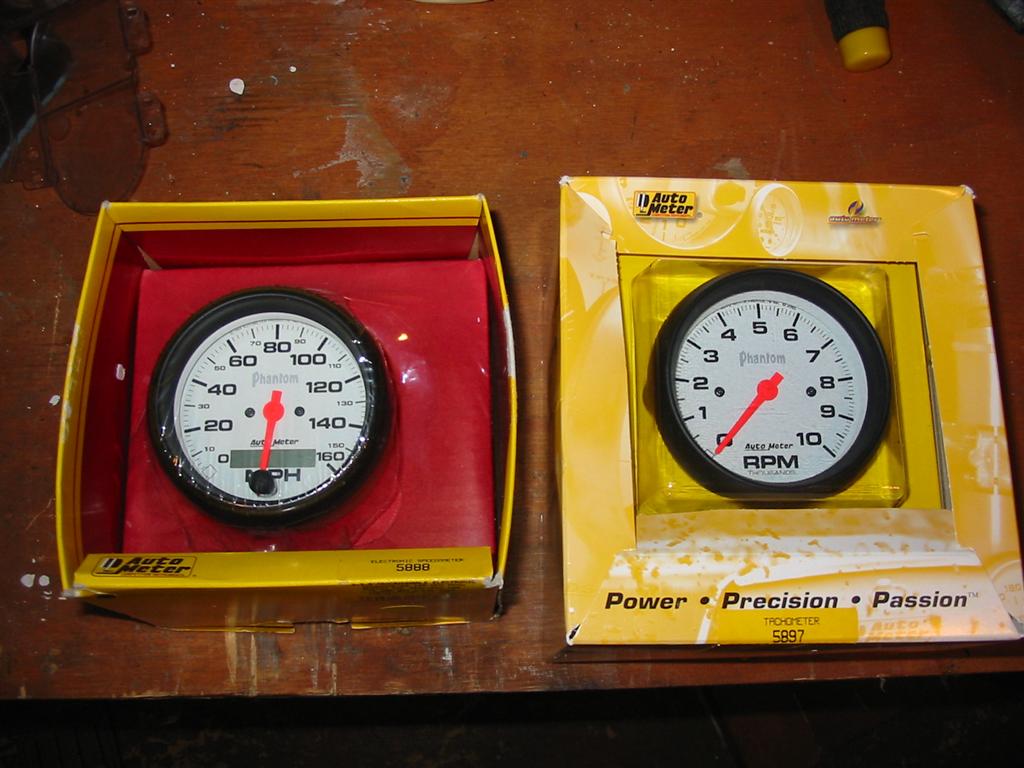
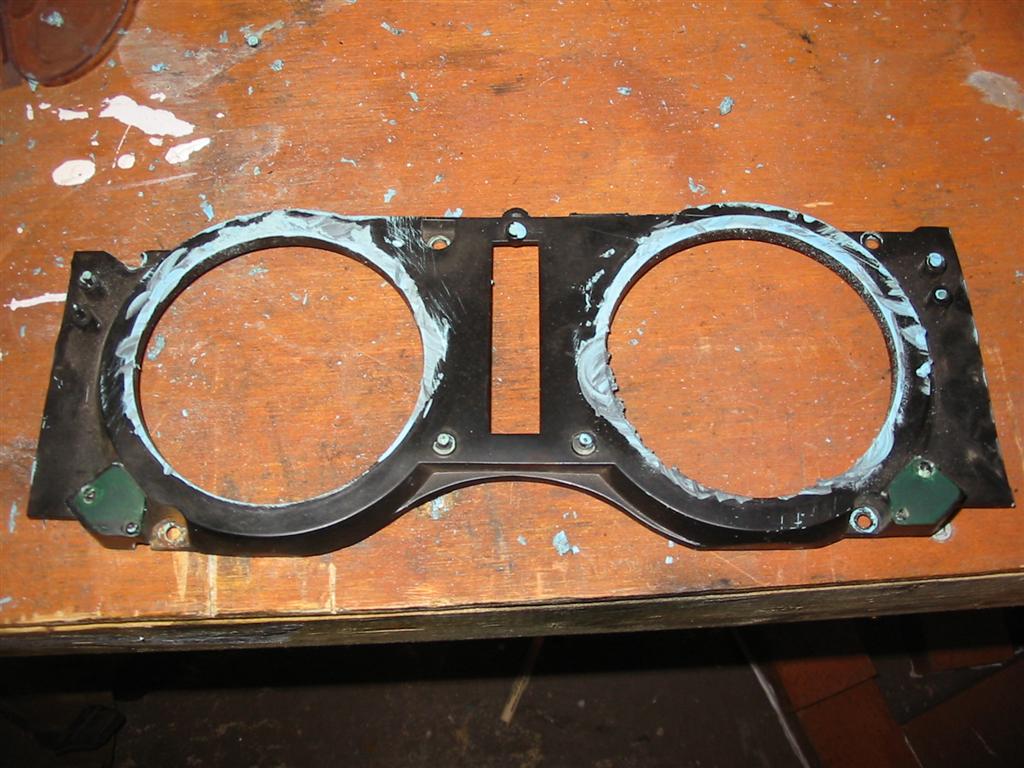
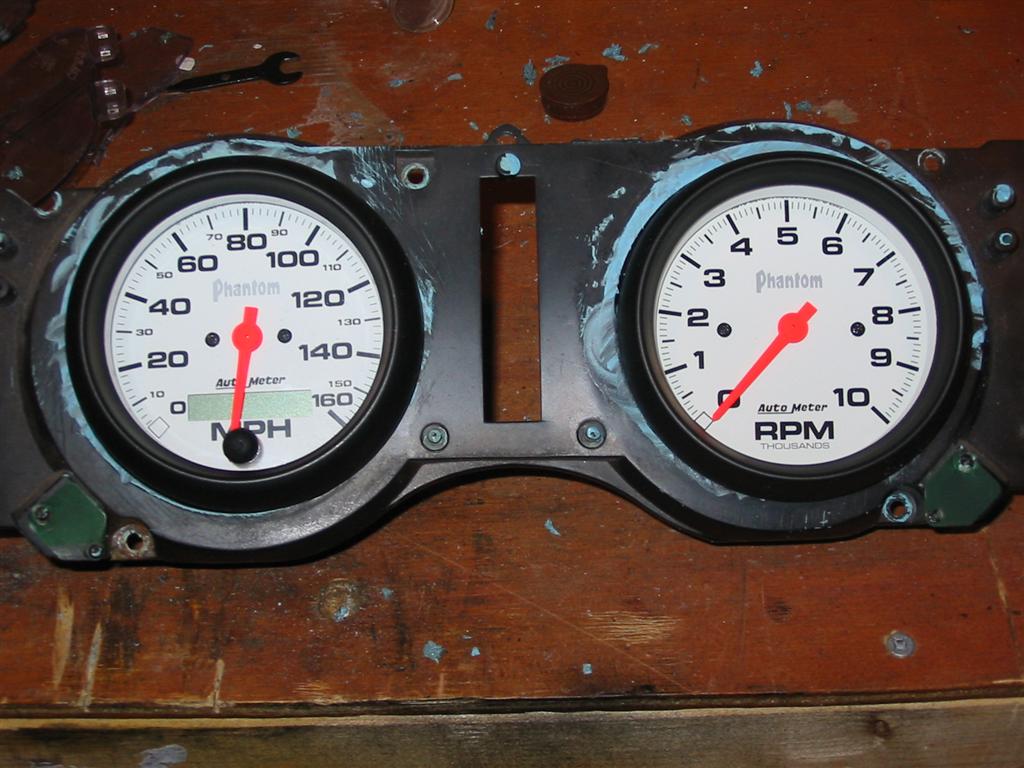
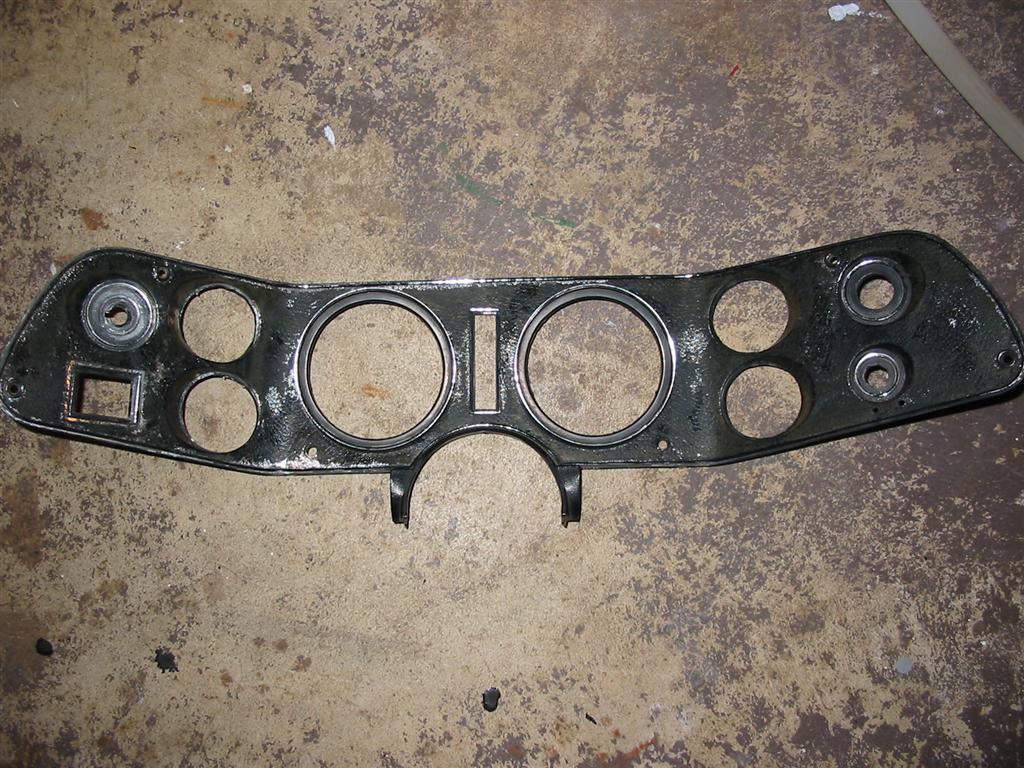
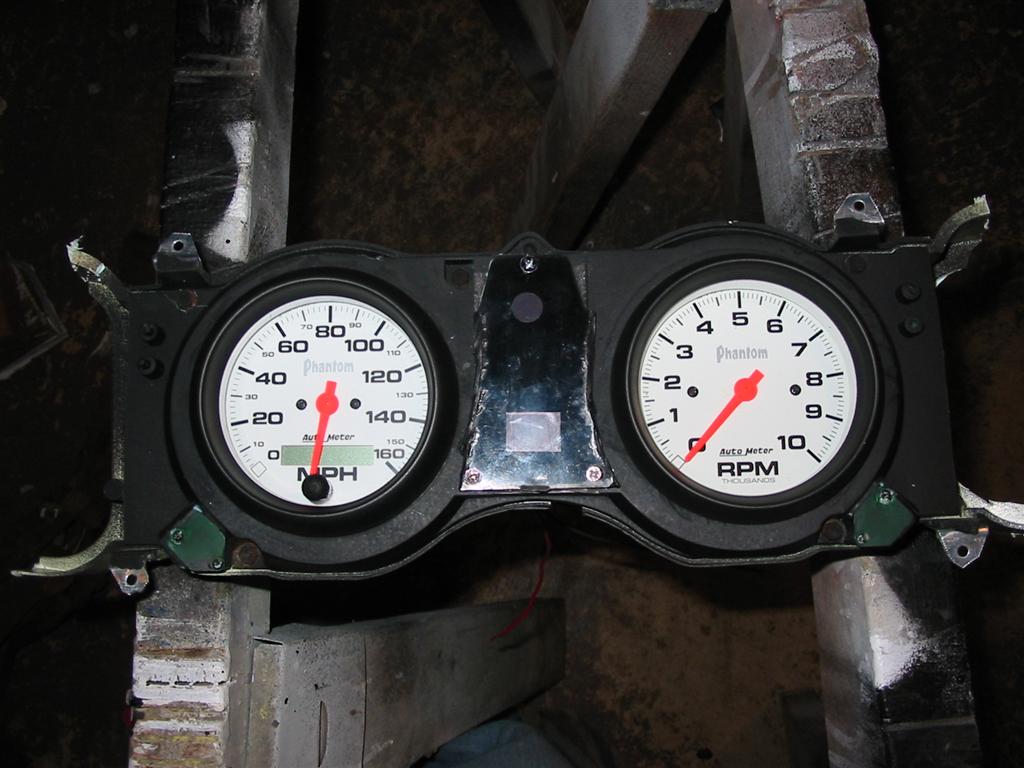
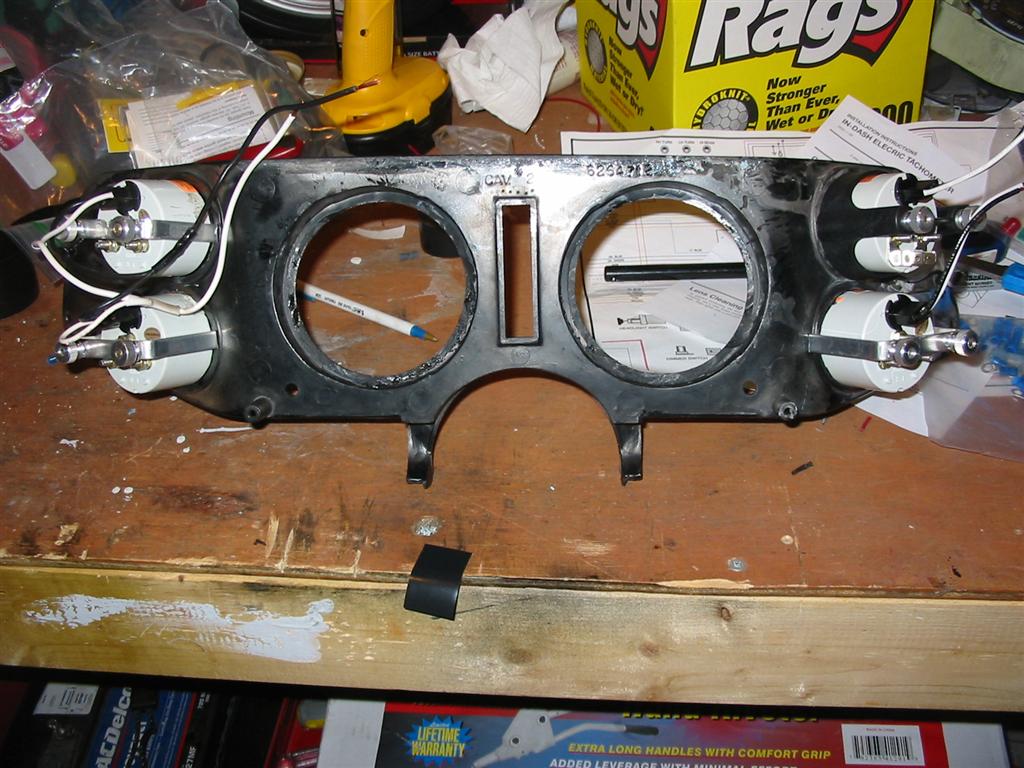
| Here is the original gauge cluster top cut up into pieces. This is the cluster where the original gauges were mounted. This one is cut into pieces in preparation of installing the Autometer gauges. Only the top center black piece will be used. | Here are the new speedometer and tachometer. |
|
|
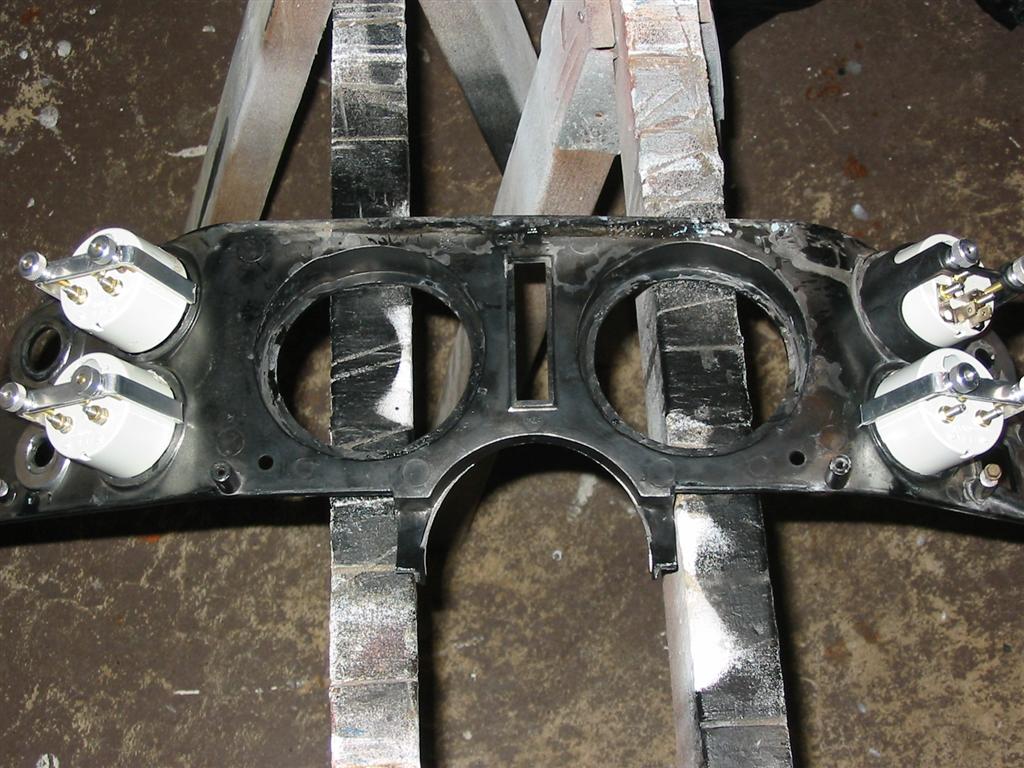
| Here are pictures of the gauge housing modified to fit the speedometer and tachometer. I had to open up and level out the original holes. I also painted the housing flat black incase any of it was visible. | |
|
|
|
|
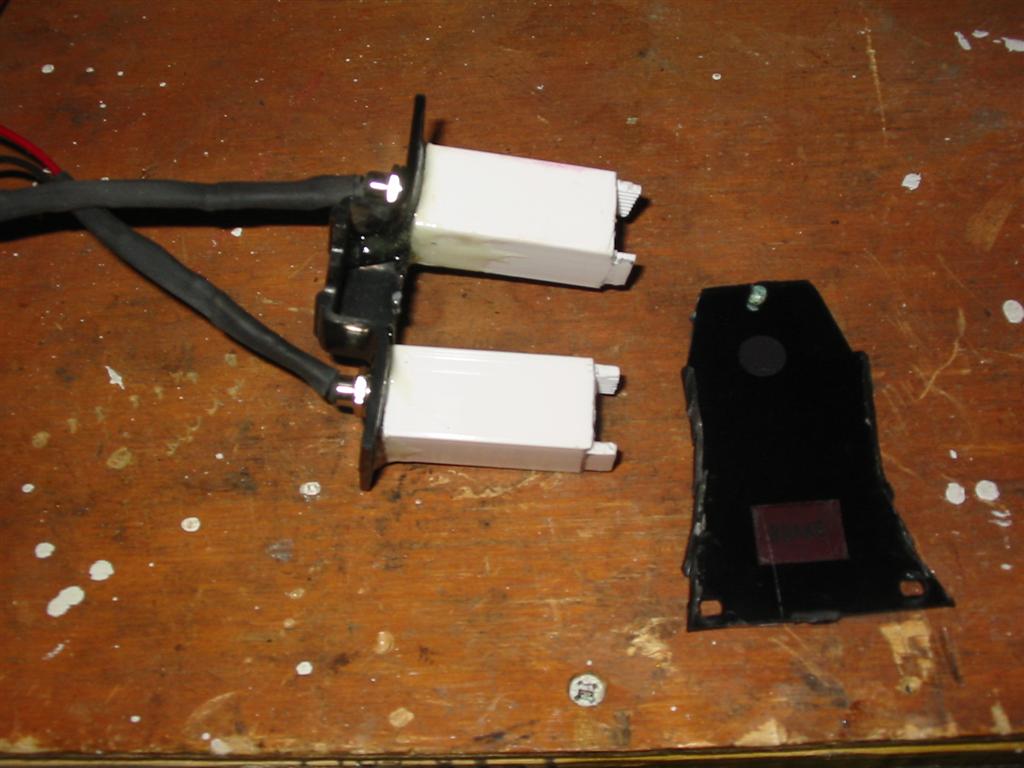
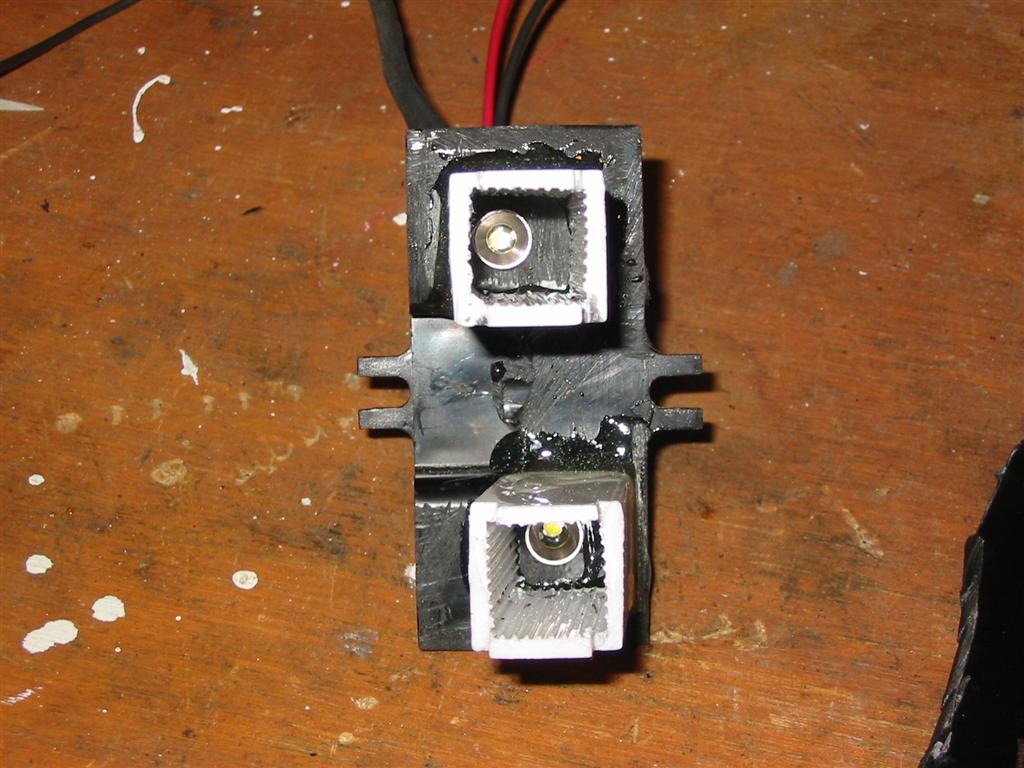
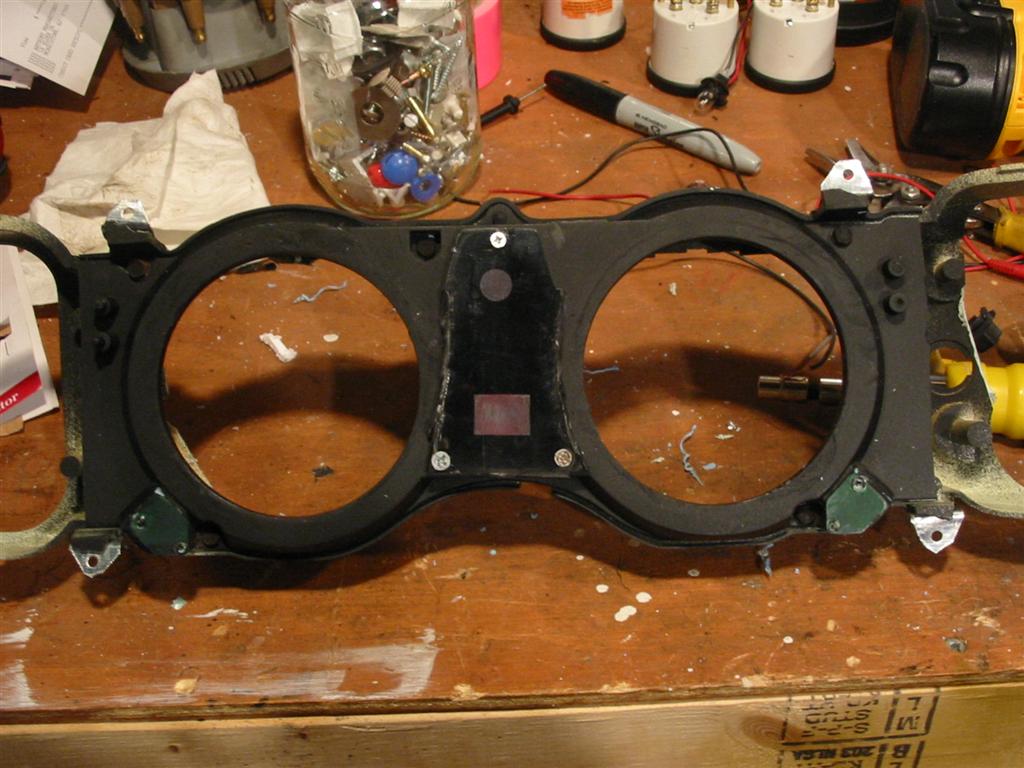
| Here is the original transmission gear indicator. I cut the bottom of it off to use as a panel to mount the brake and high beam indicators on. | |
|
|
|
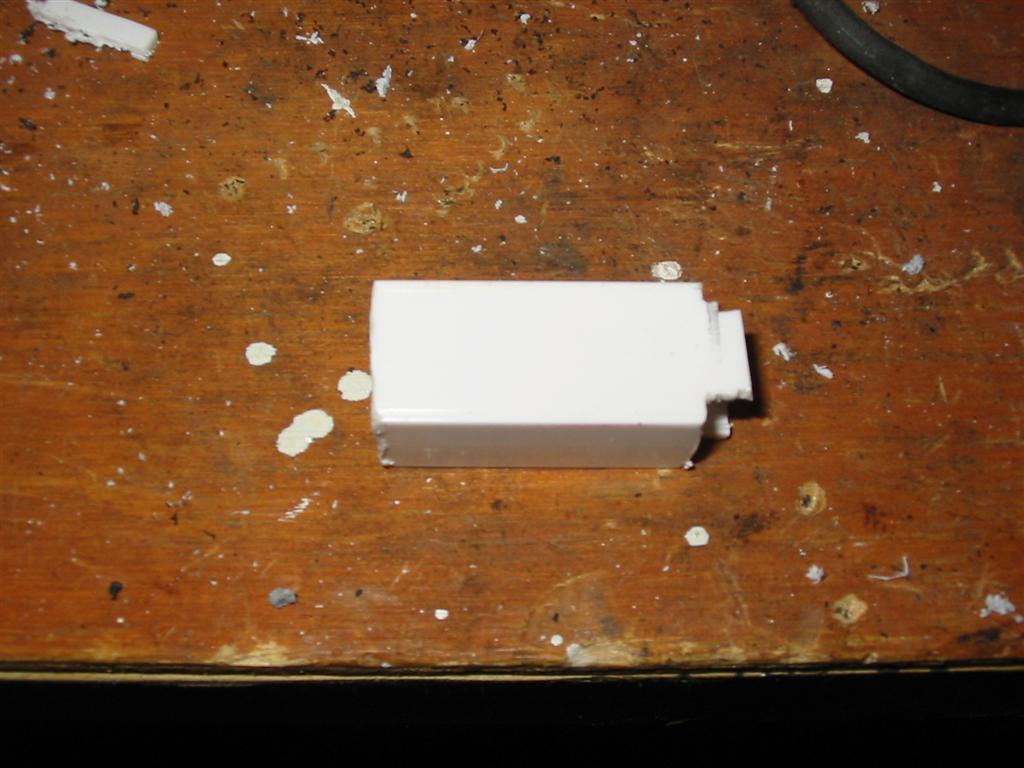
| I needed to make tubes for the indicator lights to sit in. I used an old towel bar to make these. I also used leds with a resistor to light the indicators up. | |
|
|
|
|
|
|
|
|
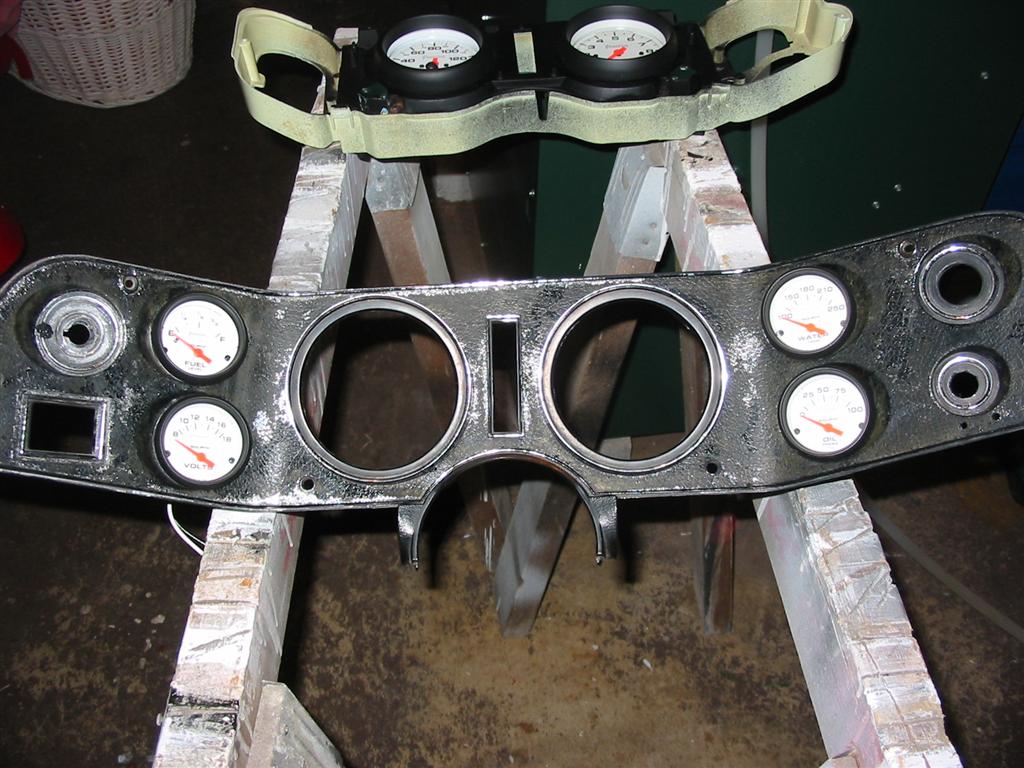
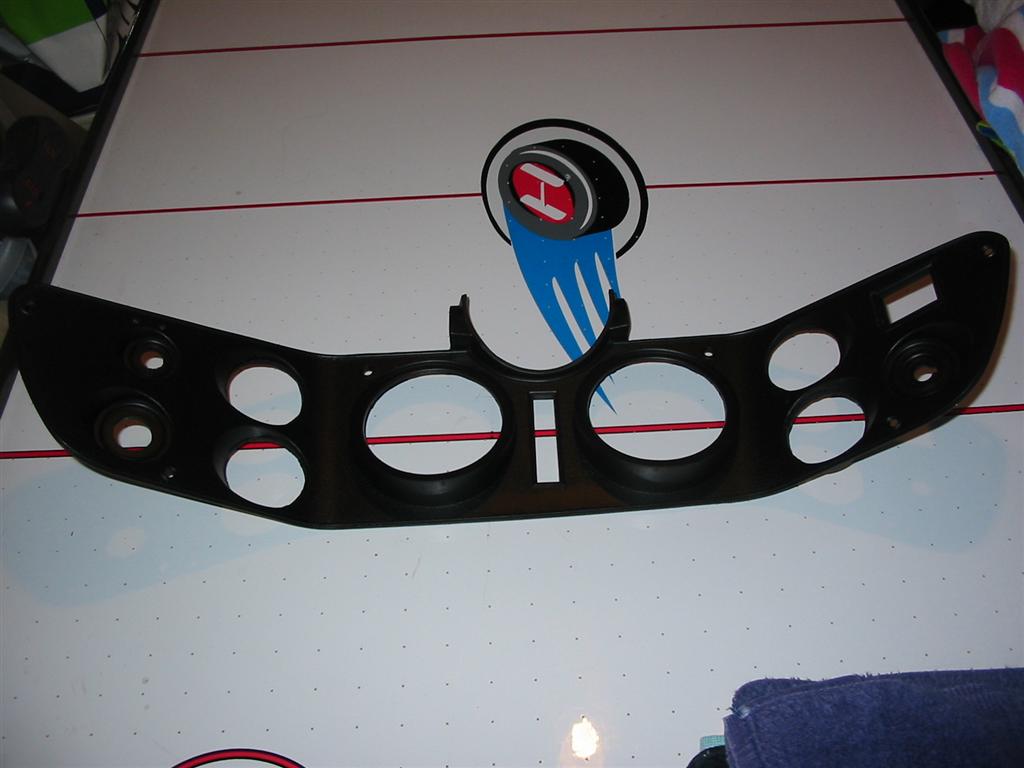
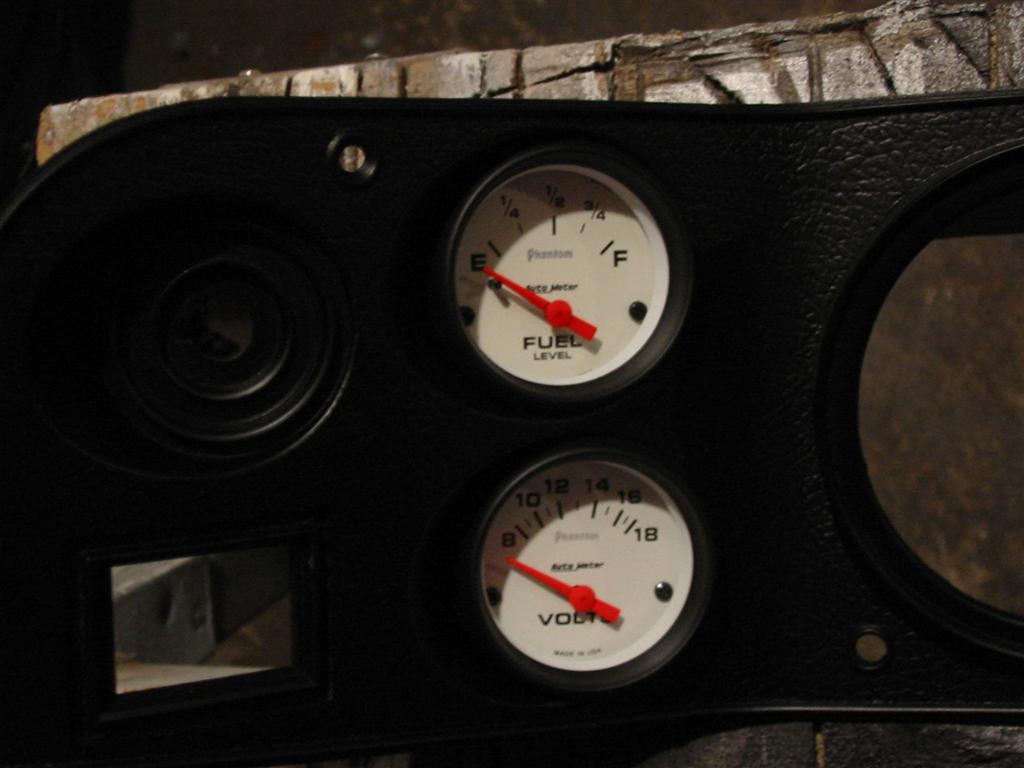
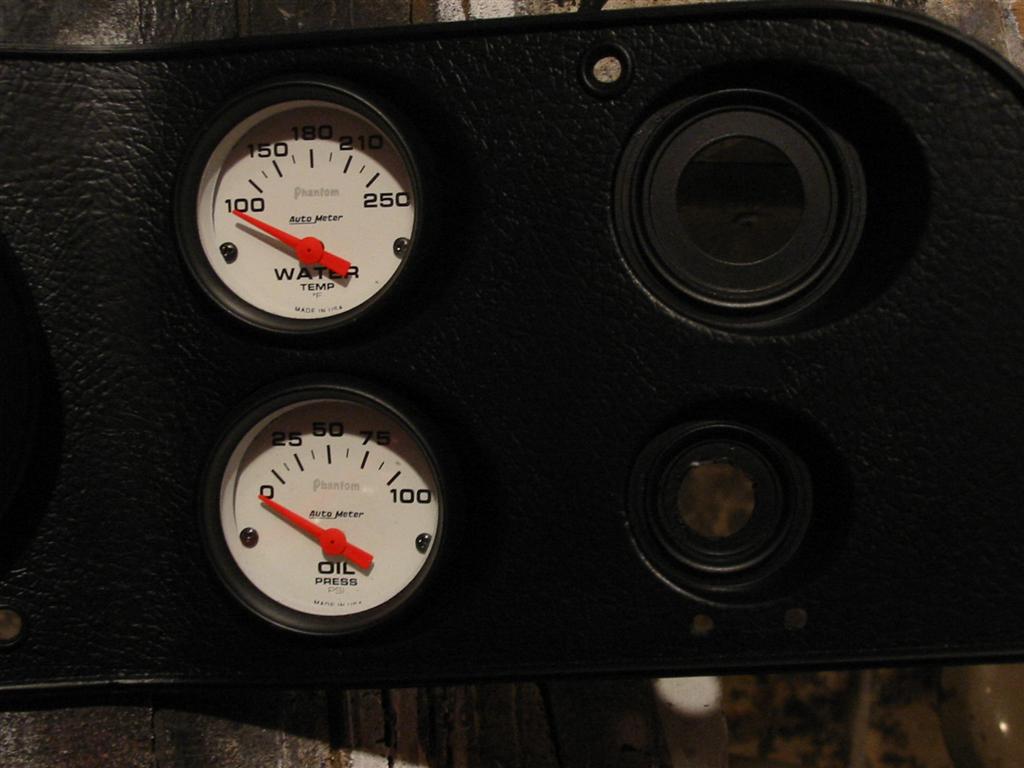
| Here is the gauge cluster cover with the side holes opened up to hold the 2 1/16 inch gauges. | Here are the guages test fitted into the gauge cluster cover. |
|
|
| Here is a picture of the gauge cluster cover painted with interior dye and a few more with the gauges installed. | |
|
|
|
|
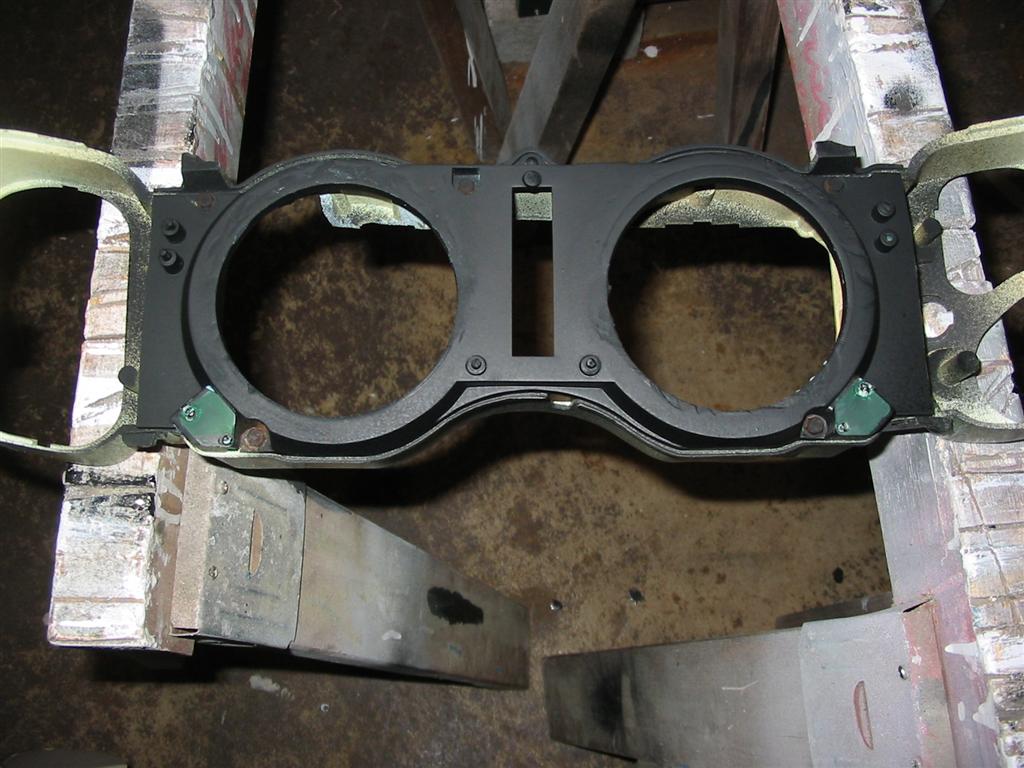
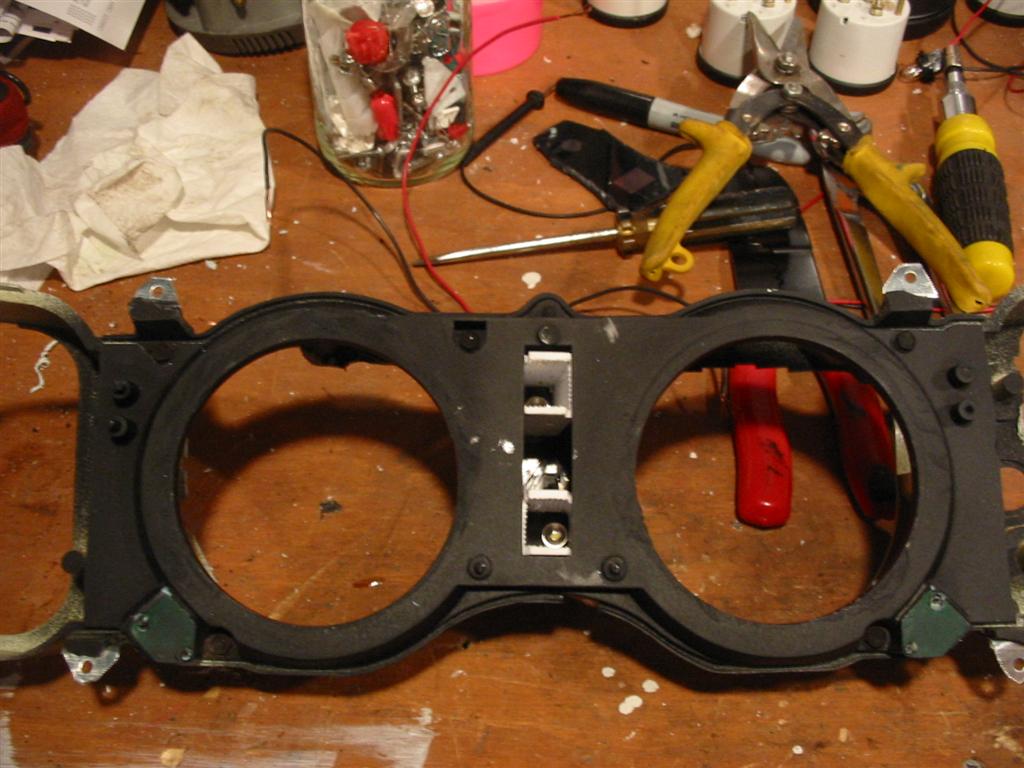
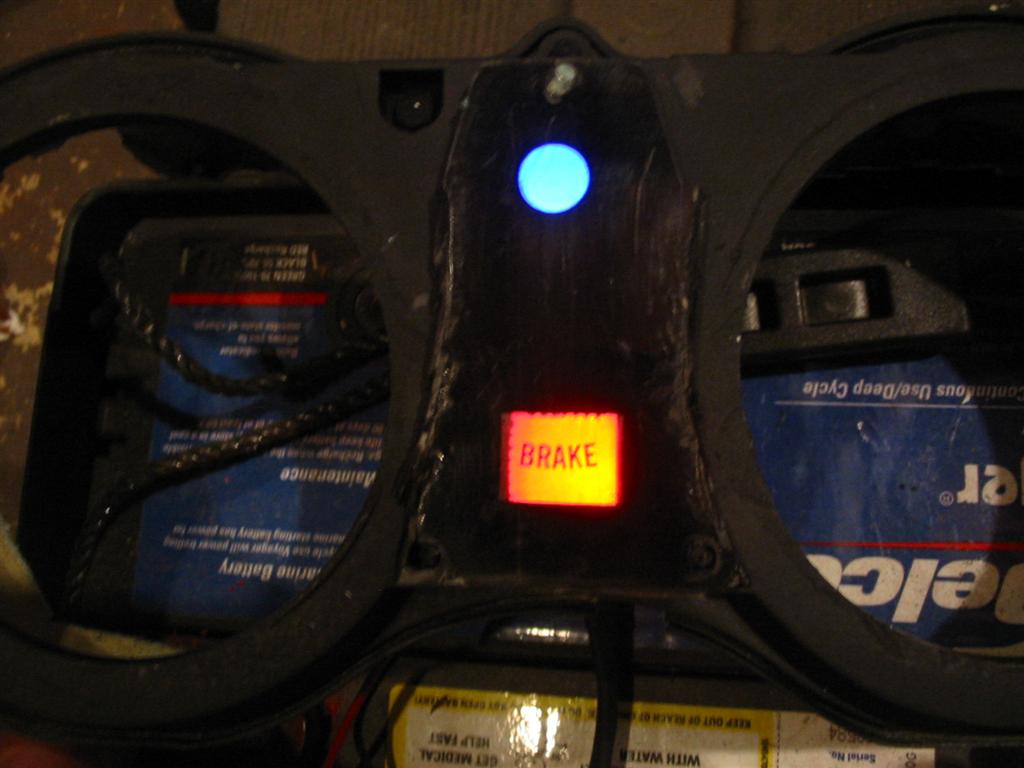
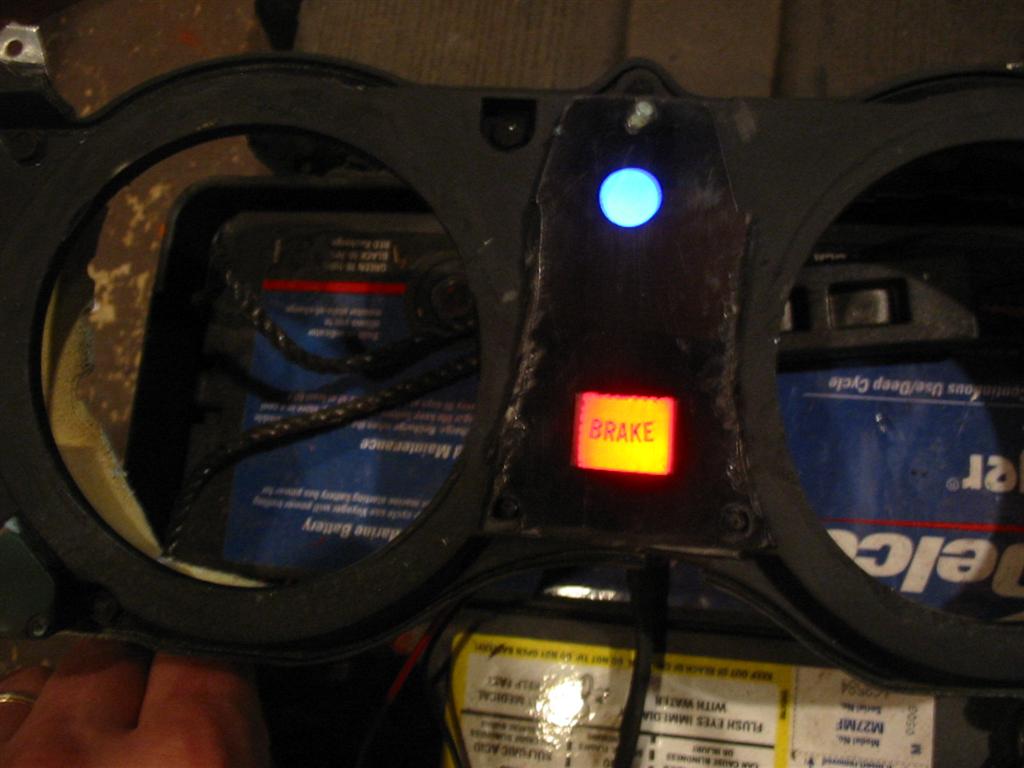
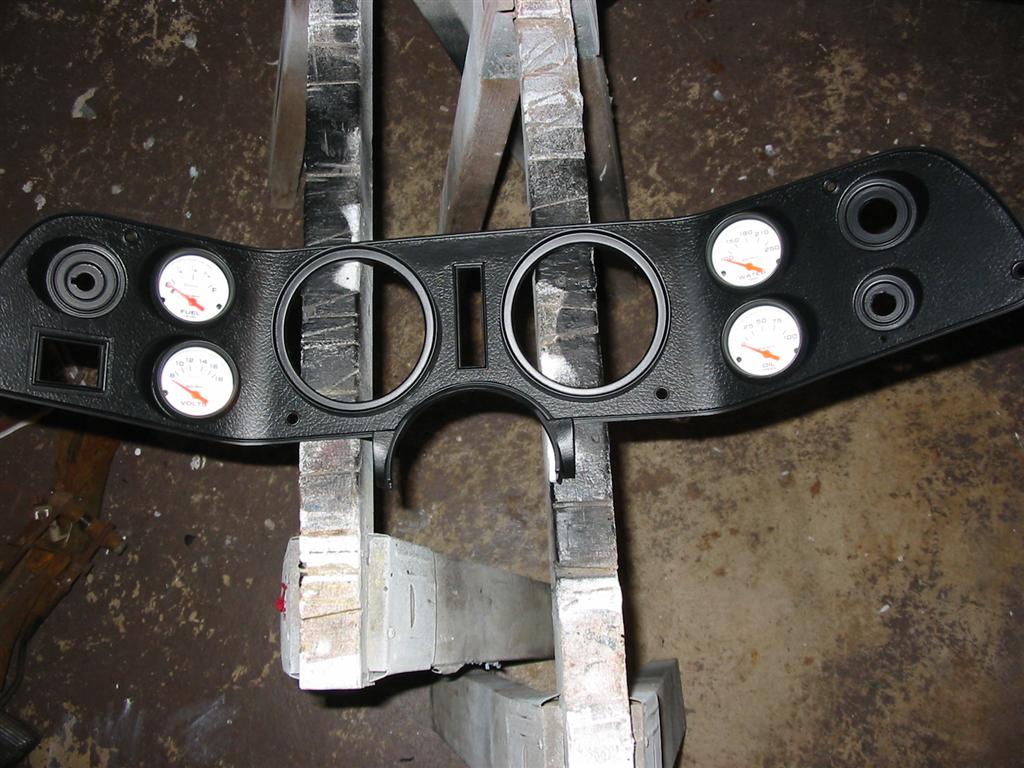
| Here is the rear of the gauge cluster cover with the gauges installed. | Here the installed Speedometer and Tachometer center section with the indicators installed. |
|
|
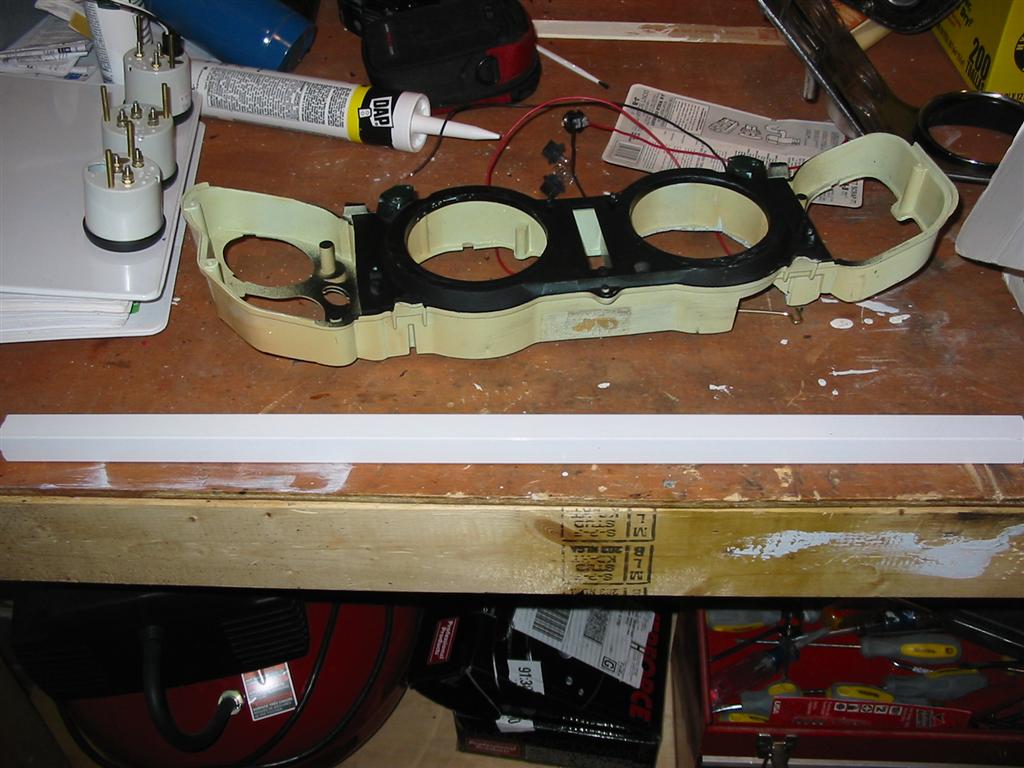
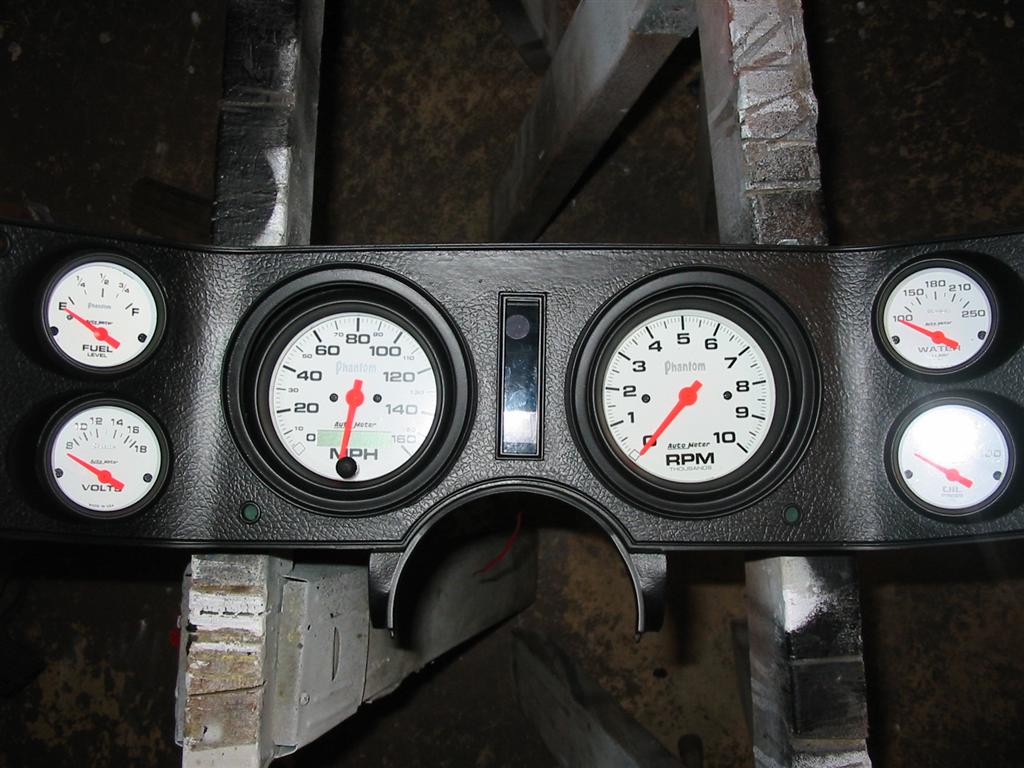
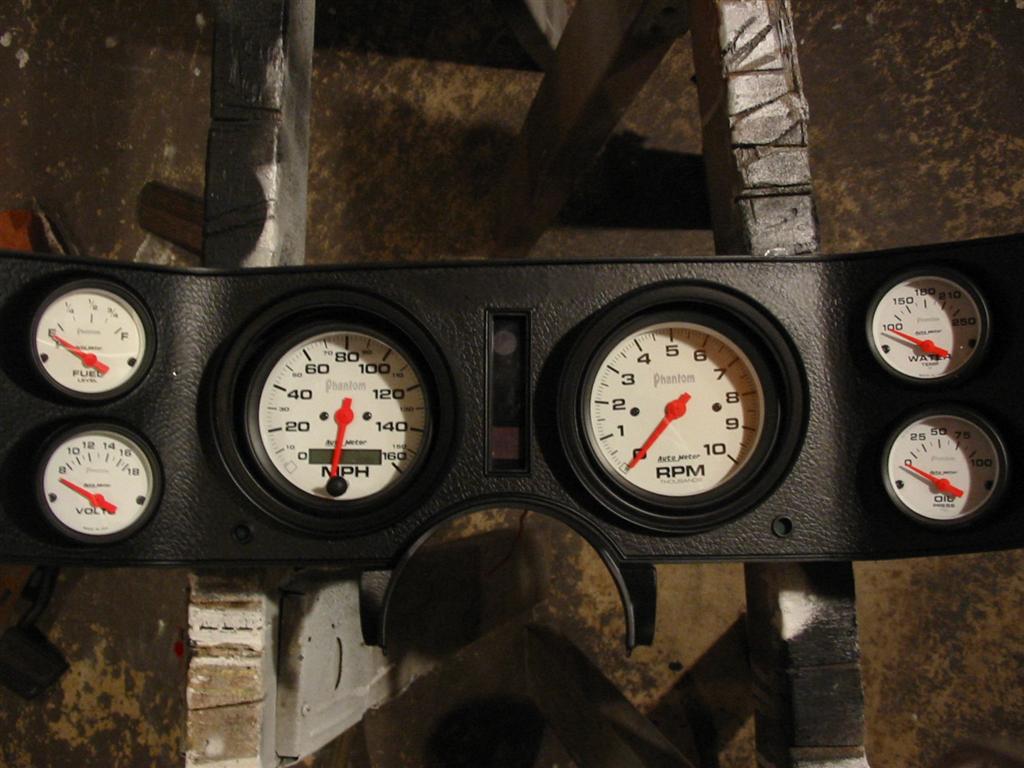
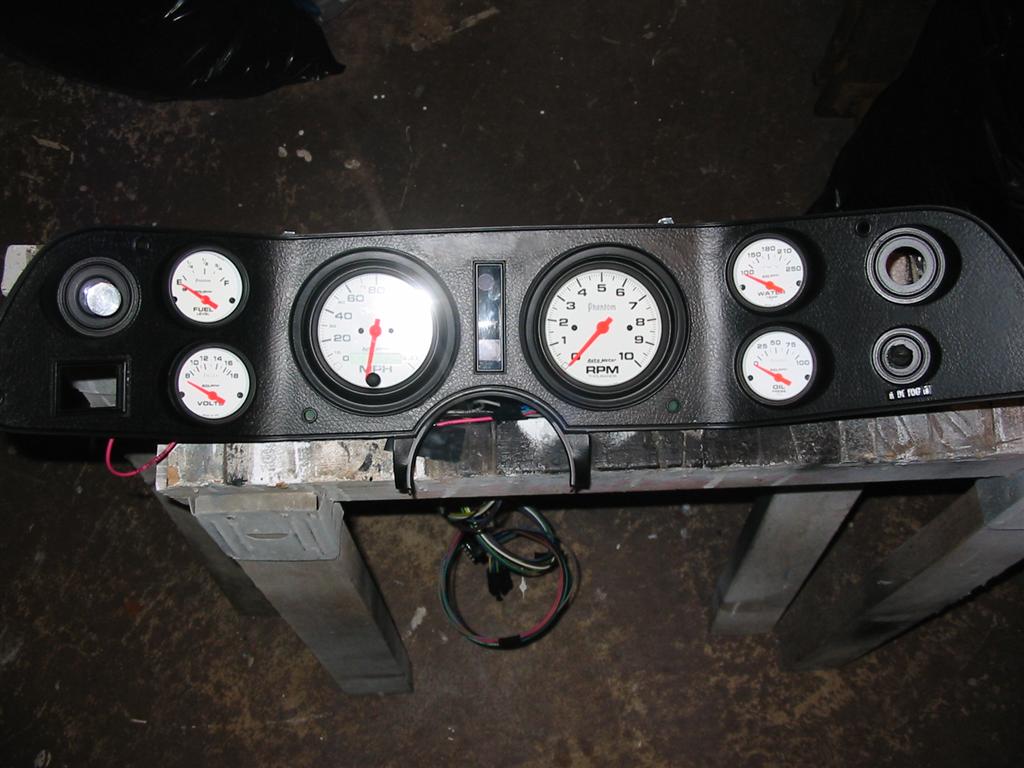
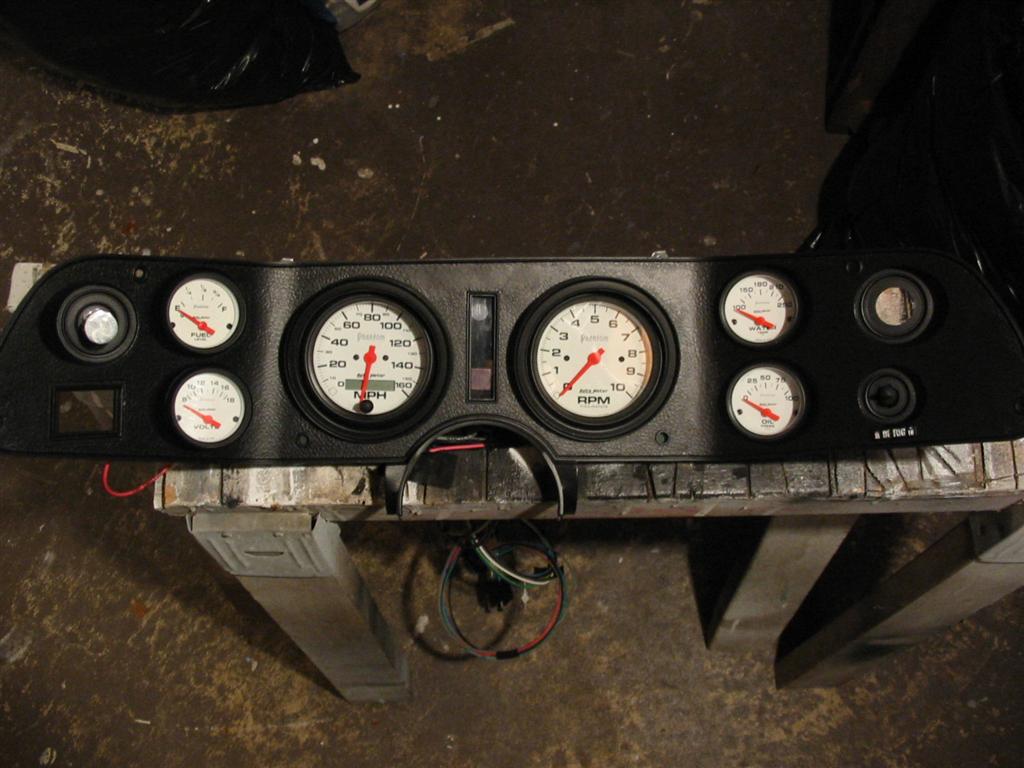
| Here are all the gauges installed and test fitted. Everything will line up better when it is installed into the dashpad since these two pieces do not mount to each other. | |
|
|
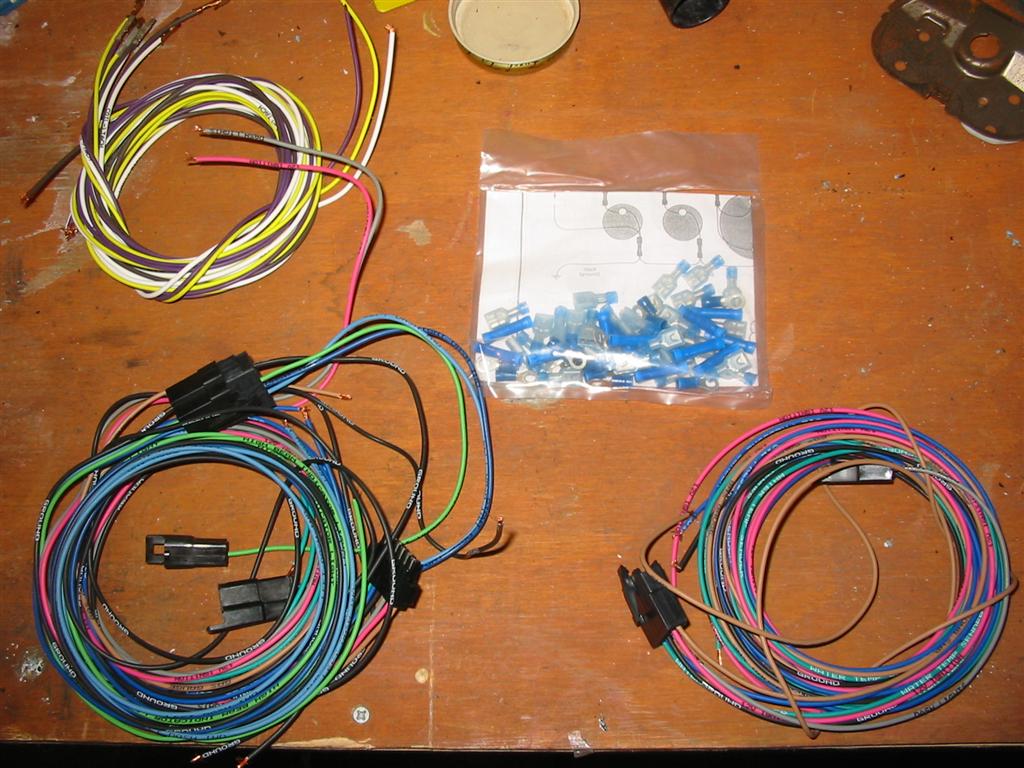
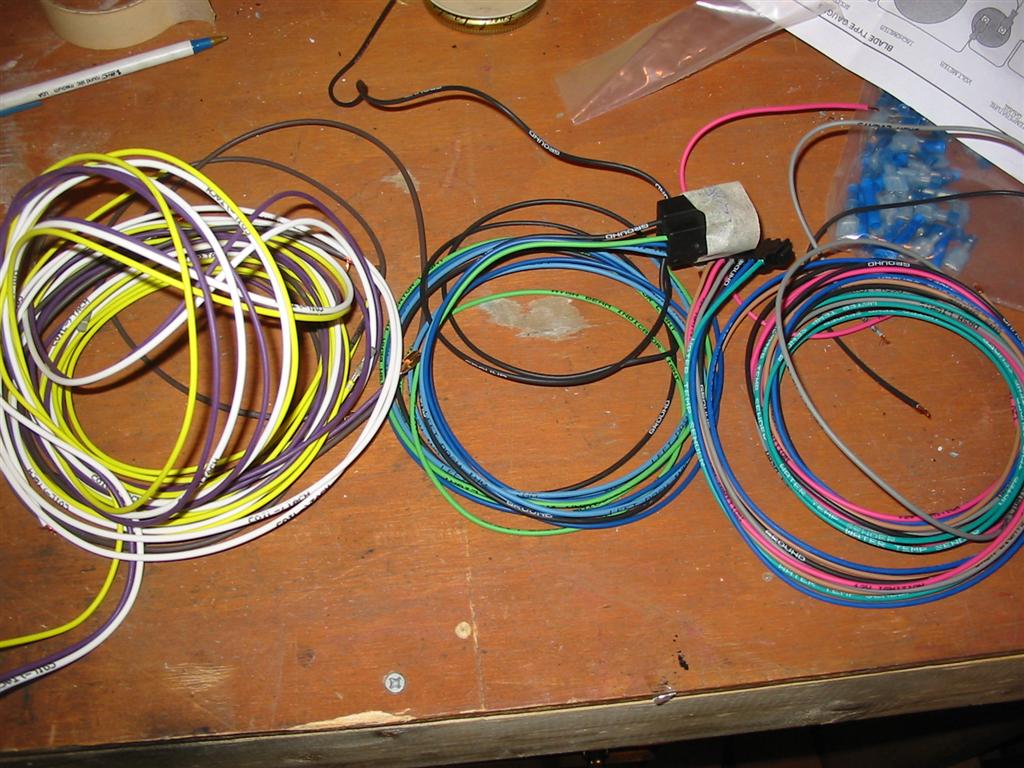
| Here is the gauge harness that comes with the American Autowire Highway 22 kit. The gauge harness is easy to use and complete with all wires and connectors. Once this is cluster is installed in the car, it will be easy to remove because it disconnects using two plugs. | |
|
|
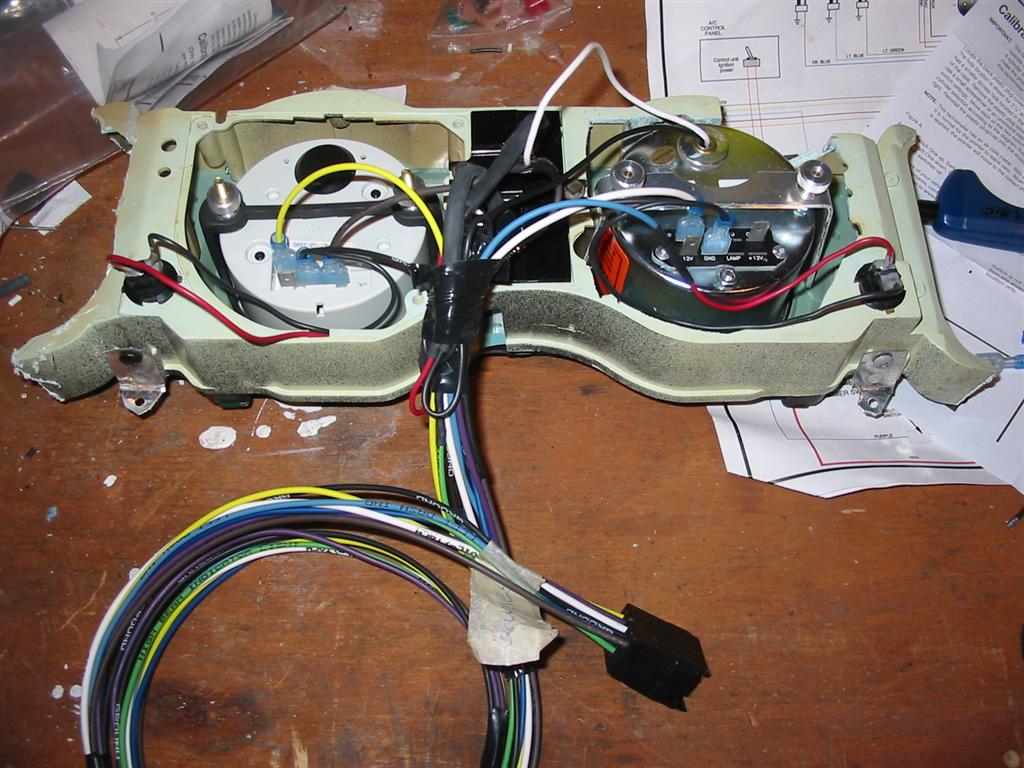
| Here is the speedometer, tachometer and indicator lights wired up. | Here is another picture of the rear of the gauges installed. |
|
|
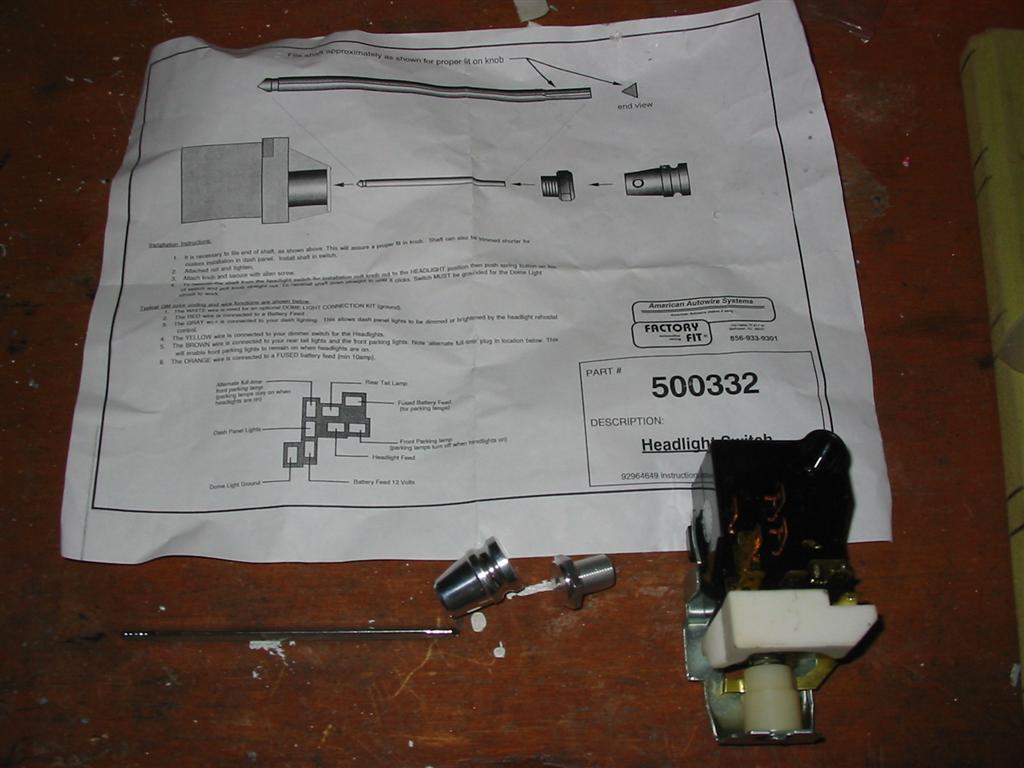
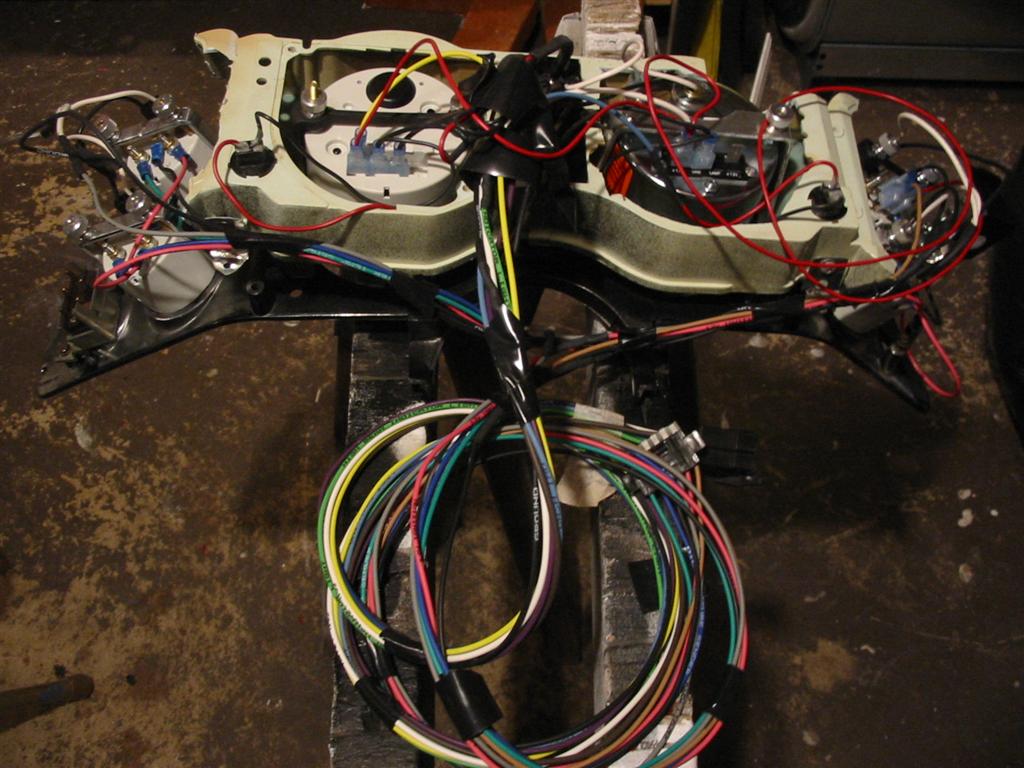
| Here is the headlight switch that comes with the Highway 22 kit. It comes with a nice billet knob with a cut to fit shaft. | Here the rear of both gauge sections all wired up. |
|
|
| Here is the final product with the defroster switch and headlight switch installed. I still need to install the wiper switch and lighter. | |
|
|