| Here are pictures of the harness with the underhood portion put together. At this point the
harness is not completed on the computer side. I still need to trim the ends and attach the computer
pins and plugs on the other end. That is the end with the blue tape. |

|

|

|
|
| Here is the installation of the thermostat. I am currently using a 180 degree thermostat.
Ideally I would be using a 170 degree thermostat. I will later update to a 170 someday. |

|

|
| Here is the engine with the radiator hose installed. I painted it black because I was never
a fan of it being red. |

|

|
| Here is the upper intake cleaned up and the grooves painted black. I then mocked up the
top half of the intake and the air filter assembly. |

|

|

|

|
| The next step was to install the distributor and plug wires. |

|
|
| The next step was to install the intake tubes. |

|

|
| Here is a close up of the intake surface on the lower intake where the intake tubes mount to. |
The tubes have gaskets that need to be installed between the tubes and the upper and lower intake. These
gaskets get held in place with little plastic pins as shown below during installation |

|

|

|

|

|
|
| Here are the intake tubes installed and ready for the upper intake. |

|

|

|
|
| Here is the mostly complete harness. Missing are the power feeds, some of the relay feeds
and some of the non-engine feeds. These will be fitted inside the car. I needed to wait to
see where the computer is mounted for fitting these final feeds. I was waiting for my
Vintage Air system to come in to see where under my dash that the computer, relays and ESC
would mount. |

|

|

|

|
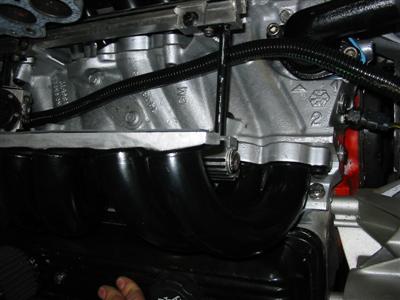
| I then ran the harness under the upper intake and through the floor behind the engine. |
|

|
| Next I installed the upper intake including the throttle cable. The throttle cable came from
Autoloc and was missing the proper connector to the throttle body. Thankfully I had an extra
end from my previous throttle cable. I also used a Lokar mount to mount the cable. |

|

|

|
|
| Lastly I installed the intake tubing and filter. This finished up the under hood portion of
the install. All that was left was the wiring and mounting of the electronics. That would
wait until I started mounting the Vintage Air system. |

|

|

|
|


